内容目录
原文链接:http://www.juzicode.com/python-tutorial-zip-unzip-tarfile
gzip和lzma等模块只支持单个文件的压缩,如果要处理多个文件时,则需要先用tarfile将多个文件打包,再用gzip或lzma进行压缩,当然tarfile模块不仅支持文件的打包,也提供了接口支持直接对文件进行压缩。注意这里“打包”和“压缩”是2个不同的概念。
1、tarfile.is_tarfile()判断是否受支持格式
is_tarfile()可以用来判断文件是否是tarfile支持的文件格式:
#juzicode.com / VX:桔子code
import  tarfile
print('files.zip        :',tarfile.is_tarfile('files.zip'))
print('logo.png.gz      :',tarfile.is_tarfile('logo.png.gz'))
print('zipspec.txt.xz   :',tarfile.is_tarfile('zipspec.txt.xz'))
print('zipspec2.txt.lzma:',tarfile.is_tarfile('zipspec2.txt.lzma'))
print('zipspec.txt      :',tarfile.is_tarfile('zipspec.txt'))
print('logo.tar     :',tarfile.is_tarfile('logo.tar'))
print('logo.tar.gz  :',tarfile.is_tarfile('logo.tar.gz'))
print('logo.tar.bz2 :',tarfile.is_tarfile('logo.tar.bz2'))
print('logo.tar.xz  :',tarfile.is_tarfile('logo.tar.xz'))
运行结果:
files.zip        : False
logo.png.gz      : False
zipspec.txt.xz   : False
zipspec2.txt.lzma: False
zipspec.txt      : False
logo.tar     : True
logo.tar.gz  : True
logo.tar.bz2 : True
logo.tar.xz  : True
注:从这个例子可以看到同样后缀的文件,可能受tarfile支持,也可能不受tarfile支持,所以最好用is_tarfile()检查判断是否支持后再使用tarfile操作文件。在这个例子中 logo.png.gz, zipspec.txt.xz , zipspec2.txt.lzma的这几个文件是使用gzip(Python进阶教程m17b–压缩解压–gzip)和lzma(Python进阶教程m17c–压缩解压–lzma)直接压缩生成的文档,可以看到这种方式生成的压缩文档并不被tarfile支持。
2、tarfile.open()创建文件实例tf
用tarfile.open()方法可以创建文件实例,其中name传入压缩文档的名称,mode为访问文件的模式:
import  tarfile
tf = tarfile.open(name='logo.tar',mode='r')
print('type(tf):',type(tf))
运行结果:
type(tf): <class 'tarfile.TarFile'>虽然tarfile.TarFile()也可用来创建文件实例,但是帮助文档中并不建议如此操作。
mode参数不同表示的含义:
| mode值 | 含义 | 备注 |
| ‘r’ or ‘r:*’ | 由tarfile判断压缩格式 | 自动判断文件格式,推荐使用 |
| ‘r:’ | 无压缩方式读文件 | |
| ‘r:gz’ | gzip压缩格式读文件 | |
| ‘r:bz2’ | bzip2压缩格式读文件 | |
| ‘r:xz’ | lzma压缩格式读文件 | |
| w’ or ‘w:’ | 无压缩方式写文件 | |
| ‘w:gz’ | gzip压缩格式写文件 | |
| ‘w:bz2’ | bzip2压缩格式写文件 | |
| ‘w:xz’ | lzma压缩格式写文件 | |
| ‘x’ or ‘x:’ | 无压缩方式写文件 | 如果文件已存在会抛FileExistsError异常 |
| ‘x:gz’ | gzip压缩格式写文件 | 如果文件已存在会抛FileExistsError异常 |
| ‘x:bz2’ | bzip2压缩格式写文件 | 如果文件已存在会抛FileExistsError异常 |
| ‘x:xz’ | lzma压缩格式写文件 | 如果文件已存在会抛FileExistsError异常 |
| a’ or ‘a:’ | 追加文件,没有则创建,只支持非压缩格式 |
3、读取查询压缩包信息
3.1、tf.list()列出文件列表并在stdout显示
下面这个例子创建文件实例后显示文件清单:
import  tarfile
tf = tarfile.open(name='logo.tar',mode='r')
tf.list()
运行结果:
?rw-rw-rw- 0/0     214036 2021-05-10 20:30:38 logo.png
?rw-rw-rw- 0/0     173748 2021-05-11 20:02:53 zipspec.txt
?rwxrwxrwx 0/0          0 2021-05-11 20:29:53 test/
?rw-rw-rw- 0/0         12 2021-05-11 20:29:36 test/1.txt
?rw-rw-rw- 0/0          9 2021-05-11 20:29:59 test/a.txt
3.2、tf.getmembers()获取所有成员
getmembers()可以用来获取成员列表,返回TarInfo实例组成的一个列表,每个TarInfo实例可以查看其name,size,mtime等属性。
#juzicode.com / VX:桔子code
import  tarfile
tf = tarfile.open(name='logo.tar',mode='r')
members = tf.getmembers()
print(type(members))
print(members)
for m in members:
    print('-----')
    print('name  :',m.name)
    print('size  :',m.size)
    print('mtime :',m.mtime)
    print('mode  :',m.mode)
    print('type  :',m.type)
    print('isfile:',m.isfile())
    print('isdir :',m.isdir())
运行结果:
<class 'list'>
[<TarInfo 'logo.png' at 0x1c91f45a640>, <TarInfo 'zipspec.txt' at 0x1c91f4fc040>, <TarInfo 'test' at 0x1c91f4fc100>, <TarInfo 'test/1.txt' at 0x1c91f4fc1c0>, <TarInfo 'test/a.txt' at 0x1c91f4fc280>]
-----
name  : logo.png
size  : 214036
mtime : 1652185838.891658
mode  : 438
type  : b'0'
isfile: True
isdir : False
-----
name  : zipspec.txt
size  : 173748
mtime : 1652198574.426916
mode  : 438
type  : b'0'
isfile: True
isdir : False
-----
name  : test
size  : 0
mtime : 1652200193.702234
mode  : 511
type  : b'5'
isfile: False
isdir : True
.............................略
3.3、tf.getmember()获取单个成员
当已知压缩文档中的某个文件名称时,可以使用getmember()生成一个TarInfo实例:
#juzicode.com / VX:桔子code
import  tarfile
tf = tarfile.open(name='logo.tar',mode='r')
m = tf.getmember('zipspec.txt') #已知某个文件的名称
print(type(m))
print(m)
print('-----')
print('name  :',m.name)
print('size  :',m.size)
print('mtime :',m.mtime)
print('mode  :',m.mode)
print('type  :',m.type)
print('isfile:',m.isfile())
print('isdir :',m.isdir())
运行结果:
<class 'tarfile.TarInfo'>
<TarInfo 'zipspec.txt' at 0x25345abe040>
-----
name  : zipspec.txt
size  : 173748
mtime : 1652198574.426916
mode  : 438
type  : b'0'
isfile: True
isdir : False
3.4、tf.getnames()获取文件列表
getnames()可以用来从压缩包中读取文件名,返回文件名组成的文件清单。
import  tarfile
tf = tarfile.open(name='logo.tar',mode='r')
names = tf.getnames()
print('names:',names)
运行结果:
names: ['logo.png', 'zipspec.txt', 'test', 'test/1.txt', 'test/a.txt']4、提取、解压文件extract[all/file]
提取、解压文件时先用tarfile.open(filename,mode=’r’)方法创建文件实例,其中mode=r,或者是前面第2节中提到的其他读模式,如果使用’r’模式会自动判断文件格式。
有3个方法可以提取或解压文件,分别是extract(),extractall(),extractfile()。
extract()用来提取单个文件,输入文件名称和解压后的路径。
extractall()用来提取所有文件,传入解压后的路径,不需要传入文件名称。
extractfile()用来解压单个文件,输入文件名称,不需要输入解压后的路径,因为生成的是个文件实例,并不是直接解压文件。该文件实例类似于open()方法打开的一个文件实例,可以用read()读取文件内容。
#juzicode.com / VX:桔子code
import  tarfile
tf = tarfile.open(name='logo.tar',mode='r')
ret = tf.extractall(path='unzip')
print('ret:',ret)
ret = tf.extract('logo.png',path='unzip2')
print('ret:',ret)
ret = tf.extractfile('logo.png')  #返回一个io。
print('ret:',ret)
print('type(ret):',type(ret))
with open('logoxx.png','wb') as pw:  # 生成解压后的文件
     pw.write(ret.read())
运行结果:
ret: None
ret: None
ret: <ExFileObject name='logo.tar'>
type(ret): <class 'tarfile.ExFileObject'>
5、生成压缩文件
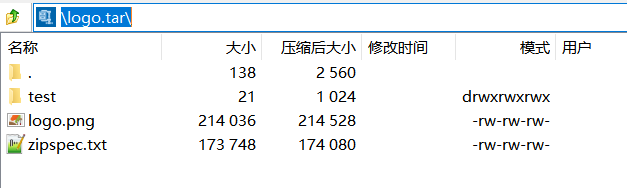
生成压缩文件用tarfile.open(filename,mode=’w’)方法创建文件实例, 再用该文件实例的add()方法添加要压缩的文件,最后用close()关闭。
#juzicode.com / VX:桔子code
import  tarfile
tf = tarfile.open(name='logo.tar',mode='w')
print('type(tf):',type(tf))
tf.add('logo.png') #添加单个文件
tf.add('zipspec.txt')
tf.add('test/') #添加整个test目录及该目录下的文件
tf.close()  #关闭
运行结果:
注意add()方法添加文件夹时会自动添加该文件夹下的文件,如果再额外添加该文件夹下的文件会导致重复添加,下面是重复添加的例子:
tf.add('test') #添加整个test目录及该目录下的文件
tf.add('test/1.txt') #再次添加test目录下的文件
tf.add('test/a.txt') 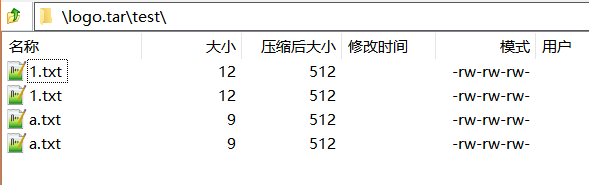
使用其他的mode值可以生成gzip,bzip,lzma格式的压缩文件:
#juzicode.com / VX:桔子code
import  tarfile

tf = tarfile.open(name='logo.tar.gz',mode='w:gz')  #生成gzip格式
tf.add('logo.png') #添加单个文件
tf.add('zipspec.txt')
tf.add('test') #添加整个test目录
tf.close()  #关闭

tf = tarfile.open(name='logo.tar.bz2',mode='w:bz2') #生程bz2格式
tf.add('logo.png')
tf.add('zipspec.txt')
tf.add('test')
tf.close()

tf = tarfile.open(name='logo.tar.xz',mode='w:xz')  #生成xz格式
tf.add('logo.png')
tf.add('zipspec.txt')
tf.add('test')
tf.close()